Initial Setup: Difference between revisions
Jump to navigation
Jump to search
Dea7hsmiles (talk | contribs) Created page with "Step 1" |
Dea7hsmiles (talk | contribs) No edit summary |
||
| (24 intermediate revisions by the same user not shown) | |||
| Line 1: | Line 1: | ||
Step 1 | = Setup Guide = | ||
== Step 1: Run Setup.exe == | |||
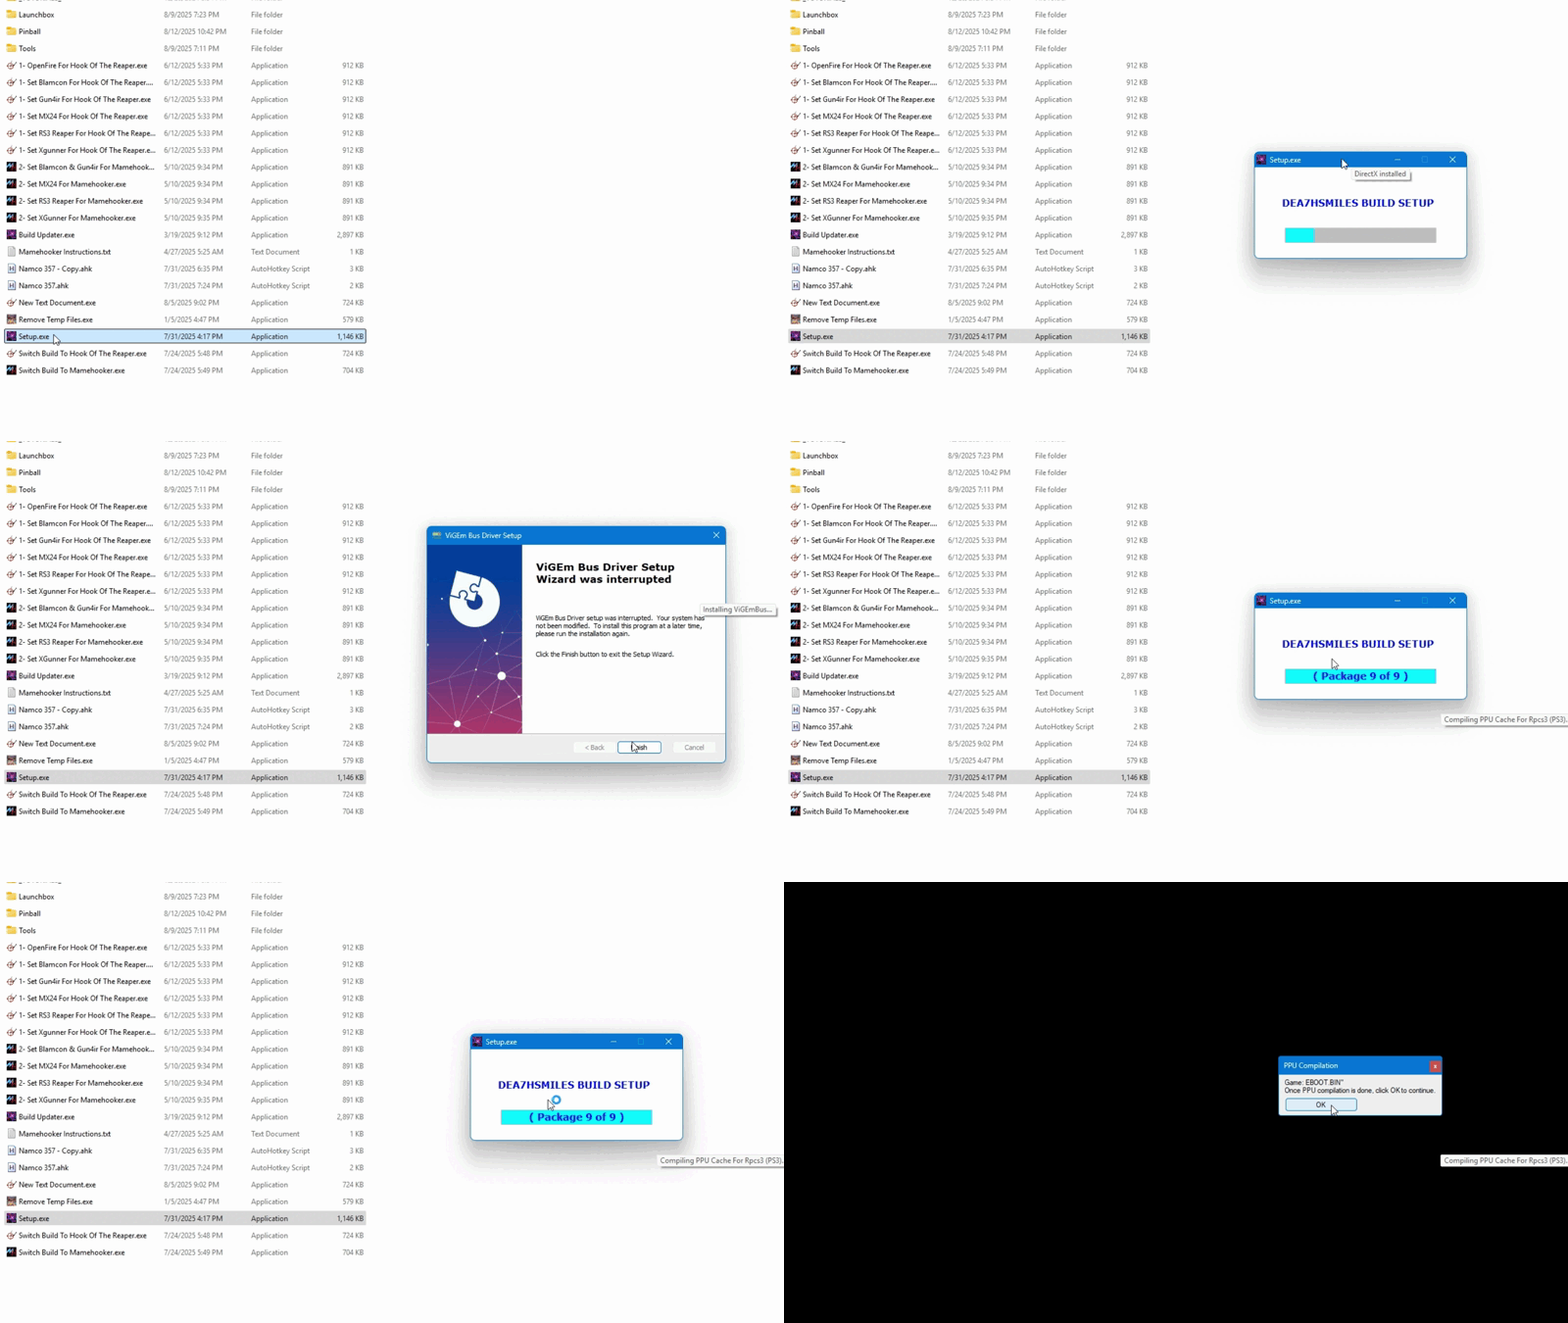
Run `Setup.exe` and go through the installation process. | |||
The `setup.exe` installs different dependencies for games like DirectX and also sets paths for MAMEHooker based on its location, since MAMEHooker has trouble using relative paths. | |||
[[File:Setup.gif|left|800px|Installation animation]] | |||
<div style="clear: both;"></div> | |||
<br><br> | |||
== Step 1A: Choose a Drive Letter == | |||
This build uses almost all relative paths, so the drive letter does not matter. | |||
<br><br> | |||
== Step 1B: Put the Build on the Root of the Drive == | |||
For example if you have the build on a drive that is drive letter H the builds paths need to look exactly like this H:\Launchbox and H:\Tools. If this step is not done, the build will not work correctly. | |||
'''This is very important.''' | |||
<br><br> | |||
== Step 2: Mamehooker/Hook Of The Reaper Setup == | |||
'''After installation, open the application and adjust the settings as needed.''' | |||
* Click on the '''Options''' menu. | |||
* Select '''Preferences'''. | |||
* Set your desired resolution and audio settings. | |||
* Click on the '''Options''' menu. | |||
* Select '''Preferences'''. | |||
* Set your desired resolution and audio settings. | |||
Latest revision as of 16:38, 19 May 2025
Setup Guide
Step 1: Run Setup.exe
Run `Setup.exe` and go through the installation process. The `setup.exe` installs different dependencies for games like DirectX and also sets paths for MAMEHooker based on its location, since MAMEHooker has trouble using relative paths.

Step 1A: Choose a Drive Letter
This build uses almost all relative paths, so the drive letter does not matter.
Step 1B: Put the Build on the Root of the Drive
For example if you have the build on a drive that is drive letter H the builds paths need to look exactly like this H:\Launchbox and H:\Tools. If this step is not done, the build will not work correctly. This is very important.
Step 2: Mamehooker/Hook Of The Reaper Setup
After installation, open the application and adjust the settings as needed.
- Click on the Options menu.
- Select Preferences.
- Set your desired resolution and audio settings.
- Click on the Options menu.
- Select Preferences.
- Set your desired resolution and audio settings.